Bill.com Set Up Instructions
To see an overview of the full 16-step process, watch this video tutorial:
16-Step Process:
Step 1: Log in to InfoCenter.
Step 2: Click on the blue “Reimbursement | Direct Orders” button.
Step 3: Click on the blue “Submit Request for Reimbursement” button.
Step 4: Scroll down on the form to the first checkbox and click the link on the words “this form”. You can also access this form by clicking here.
Step 5: Fill out the Google Form once per family. We highly recommend selecting the “Direct Deposit” option.
Step 6: Watch for an email from Bill.com within the next three business days. The name on the email is “Amy Bowman on behalf of OpenEd Inc” and the subject line is “Bill.com Invite from OpenEd”. Check your spam folder as it might end up there.
Step 7: Within the email, click on the blue “Accept Invitation” button, which will send you to Bill.com’s Account Creation page.
Step 8: Enter your First Name and Last Name and create a Password. Click “Create Account”.
Step 9: Enter your Phone Number and click “Send Code”.
Step 10: Enter the Confirmation Code you just received and click “Submit”.
Step 11: Select the “I’m with a business” option and click “Next”.
Step 12: Enter your first and last name under “Company name” if it’s not already pre-populated.
Enter your Phone Number, Address, City, State, and Zip.
Under “Business Type”, select “Individual”.
Under “Industry”, select “Education”.
Under “Accounting Software”, select “I don’t use accounting software”. Click “Next”.
Step 13: Enter your first and last name under “Primary Company Owner” and enter your date of birth.
Under “Tax ID Type”, select “EIN” and enter the number “205454282”. Click “Next”.
Step 14: STOP! If you prefer to receive a physical check in the mail for your reimbursement payments, then you’re done. Just close the browser and you’re good to go! If you prefer to receive a Direct Deposit, then continue by entering your bank information.
Enter your “Routing Number”, your “Account Number”, the “Account Holder Name”, and select the “Account Type”. Click “Save and finish”.
Step 15: Select the “Continue with a free account only” option.
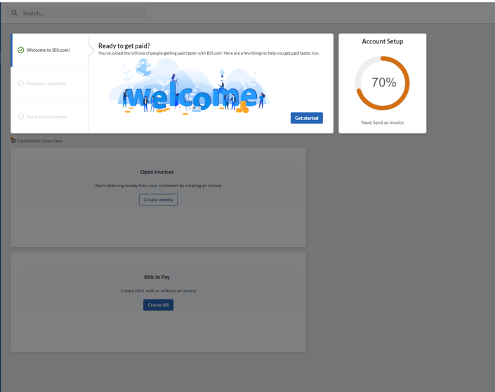
Step 16: Congratulations, you’re done! Bill.com will make it seem like you need to send an invoice to OpenEd to complete your account setup -- or even to receive a payment -- but you do not! In fact, OpenEd won’t do anything with any invoices you send, because we’ll just send you the correct amount of money from the Request for Reimbursement form from InfoCenter anyway. Now all you have to do is submit some Requests for Reimbursement and you’ll be able to receive the reimbursement payments.
This is the screen you’ll see when you’ve completed everything:
Please note: You may receive a pop-up ad inviting you to obtain reimbursement through a single-use virtual card. We suggest not selecting this limited form of payment and completing only the steps for a physical check in the mail or direct deposit as outlined above.
If you have already selected to receive a virtual card and wish to switch from that reimbursement option, please do so through the live support feature at help.bill.com.
Contact us
If you have questions, please reach out!